Category Archives: Arduino

Arduino: RC Car

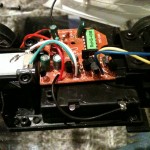
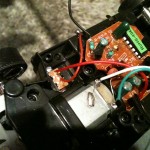
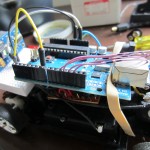
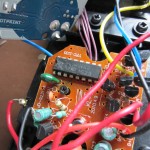
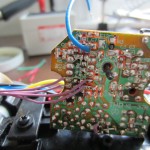
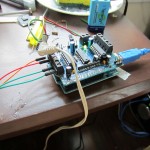
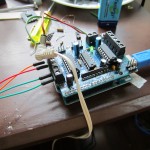
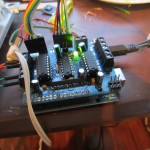
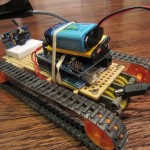
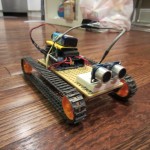
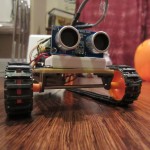
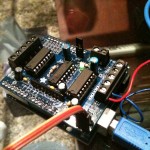
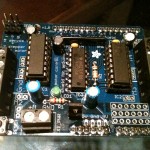
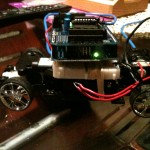
I had bought a RC Car from walmart for about $15 to use with the Arduino Motorshield a while back (see here). Fortunately, I had taken some pictures before I removed the RC receiver circuit from it. Turns out that its lot more efficient to use the onboard controller along with an Arduino instead of using a motorshield. I didnt some research and found out that many “cheap” RC cars use the same Realtek TX2 & RX2 chips inside. I was lucky enough to find the same inside this RC car.

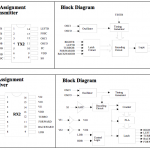
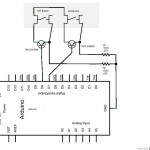
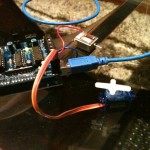
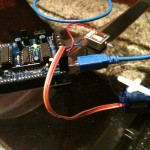
I was able to connect 5 wires to the Arduino and control the car by sending a HIGH signal directly to the RX2 chip. Here are the in assignments.

Arduino      RX2
Ground           PIN2 (GND)
PIN 13            PIN11 (Forward)
PIN 12            PIN10 (Backward)
PIN 11            PIN6 (Right)
PIN 10            PIN7 (Left)

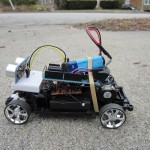
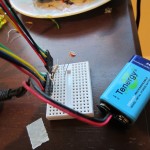
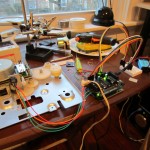
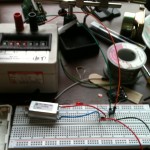
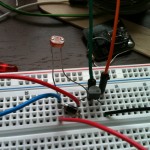
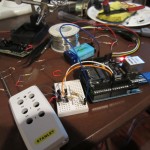
The 2 motors and the RX2 circuit is powered by 3xAA batteries in the car itself and the Arduino UNO was powered by a 9V battery. I also decided to add a PING sensor to make the car backup automatically when it comes close to something. The code is not perfect as you can see in the video, but it can be modified later.

TX2RX2.doc (Realtek TX2 & RX2 info)

CarBotPing.pde (Arduino Code)


Arduino: PhotoResistor Motor & Stepper Motor

I bought a bunch of CdS photo resistors from ebay. The basic use of these is to change resistance depending on the ambient light it detects. More light = less resistance and less light = more resistance. You can set it up in a circuit with a DC motor to make it spin faster or slower. See attached image for the circuit. Basically when the transistor gets more ground on the base, it flows more current through, making the motor spin faster.

For Stepper Motor, I used the arduino code and information available here to setup the photo resistor with an Arduino Uno board. The resistance from the photo resistor is converted into an analog signal which in turn is converted to a integer value. This value can be used to turn something on/off. In this case, I used a stepper motor connected to a group of gears that I removed from an old HP laser printer. The stepper motor is connect to a motor shield and set to turn on when the “int” value of the photo resistor is 900 or higher. See attached Arduino code.

PhotoStepper (copy to .pde file)


Arduino: Walker (updated 2)

My own walker robot! Made with Arduino Uno.

All credit goes to lumi from LetsMakeRobots.com for his Chopstick Junior 1.0

Still need to work on the legs to give it a better grip. And cut down the weight by removing the breadboard and a lighter Arduino nano.

I have added some grip to the legs with some elastic rubberbands, but not much improvement. My Arduino Nano came in the mail so I have added that instead of the Uno board. This version also uses a blackberry phone battery that I mentioned in the previous post, it seems to work well.

Update 2:

Added more grip with the rubber fingers that are used in offices to count money/paper etc.


Arduino: WebSwitch

I found a remote control switch by Stanley at Bed Bath & Beyond for $10. It lets you turn on/off 3 electrical outlets with a small remote control. Its similar to this one on Amazon. I was able to open the remote easily and get to the buttons. I soldered couple of wires to the end of the terminals and was able to extend it out to the side of the remote. I connected the wires to a transistor to the emitter and collector. Used a 10k resistor to ground it to Arduino’s ground. Pin 7 & 8 were connected to the base of the NPN transistor (2N3904).

At first, I tested it with serial communication. The code would listen for a “1” or a “0” from the serial monitor and send a HIGH/LOW to pin 7 or pin 8 (1 for ON and 0 for OFF). Once I got that to work, I changed the code so it will read a index.php on a webserver. The index.php is set to read a txt file which has a 0 or 1 written to it by another PHP file. “On.php” will write a “1” to the txt file and “Off.php” will write a “0” to the txt file. When Arduino gets the information, it activates the appropriate pin to activate the transistor for 1 second.

RemoteSwitchWeb (code)
php files (copy these files to root of php server)


Arduino: TrackBot

I have been trying to get a stable base for a Arduino track bot. I had trouble with coming up with a good battery for powering the 2 motors. I tried using a 9V battery but it consumed the power in a few minutes. I found a good alternative by using a blackberry phone battery which is about 3.7V DC (BAT-11004-001). The power lasted fairly long time and was sufficient enough for the track bots motor. I was able to connect it as an external power to the motor shield with an on/off switch allowing me to cut the power to the motor quickly. The code is similar to what I had before. Just a simple Ping sensor looking for the distance, backs up and turns when it senses something 8 inches away.

TrackBotPing

Original Video


Arduino: Halloween Skull

Decided to make a scary skull for Halloween. Bought a styrofoam skull from christmas tree shop. The eyes are actually toy rings for kids that hot glued on a round plastic and a BIC pen. Connected a couple of servos to an Arduino and a Ping sensor and it was good to go.

The video was taken before I added the Ping sensor, so I will add another one soon.

Completed Video


Maker Faire Rhode Island


Show your support

Make a Pledge

Share on Facebook

Follow on Twitter


Eyes of Balls

This is a recreation of a project that I saw on todbots website. It was called “scary shifty servo eyeballs“. Mine just has a face over it made out of cardboard paper. Its a great way to reuse those yellow folders/binders lying around in your office. I used 2 x HXT 500 servos for the eyes and 1 x HXT 900 servo for the neck/face. The code was exactly the same.


PopsicleBot

I saw this “Popsicle Bug” robot on this website. I was very inspired by it and wanted to make one of my own. It reminded me of my old lego projects that I did in college. Except this was very light weight. The original maker left it very organic which is what I wanted to do and its fairly inexpensive to make. I used regular thread from my wife’s stitching box instead of a fish line. You can pretty much use any string/thread thats strong enough to handle the tension.


Arduino: Adafruit Motor Shield

Finally had to give in and get a motorshield for the Arduino. I purchased it from RobotShop not knowing that it was a kit (i.e. you build it yourself). I should have read the title of the item a little better. It was fun to build the shield with these instructions PDF. It helped me build up some soldering skills. Fortunately, I bought some soldering flux paste from Radio Shack which helped me keep my work clean. The shield lets me power up to 4 DC motors, 2 servos or 2 stepper motors. You can use it to power bigger motors using an external power supply. The shield has 4 H-Bridges provided by L293D chipset.

I set it up with a RC car which has 2 motors for steering and forward/reverse movement.

All the instruction on how to build the motorshield and how to use it with the library are available on this ladyada.net website